Are you facing can’t connect to camera issue on your android phone? Are you getting “camera stopped” & ” can’t connect to camera “ notice while opening the camera app on your android smartphone? I have personally experienced this issue on my Nokia 6 mobile phone. I could fix this issue myself using some techniques learned from the internet only. And have an overall idea about this issue. So, I am going to help you with some easy tricks, with the help of which, you can fix can’t connect to camera issue.
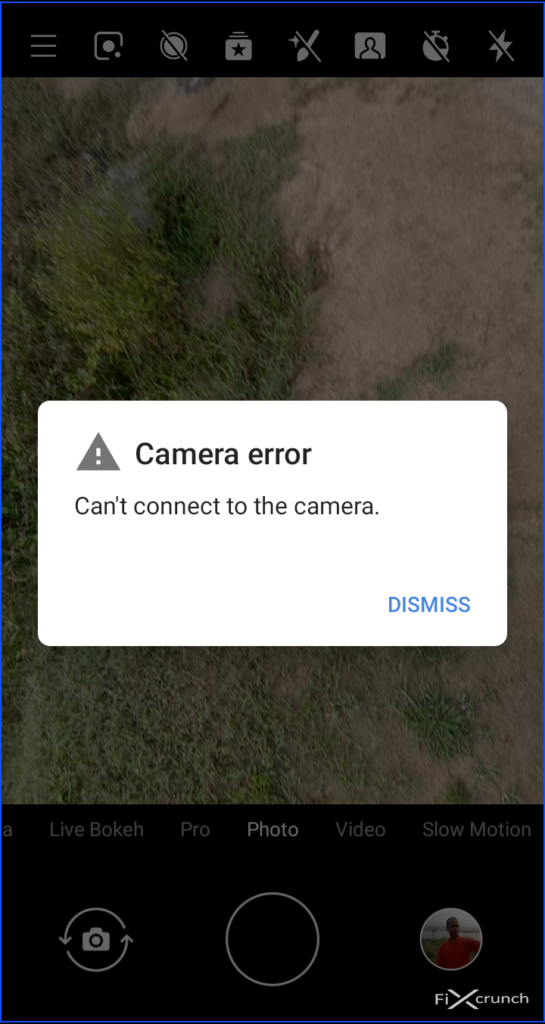
Table of Contents
- 1 Reasons Behind Can’t Connect to Camera Issue
- 2 Ways of Fixing Can’t Connect to Camera Issue
- 2.1 Method 1- Restart your device
- 2.2 Method 2- Restart in safe mode
- 2.3 Method 3- Remove all the apps that you have given access to the camera
- 2.4 Method 4- Delete all cache data of your camera app
- 2.5 Method 5- Force stop the camera app
- 2.6 Method 6- Try installing any third party camera applications
- 2.7 Method 7- Wipe cache partition by Recovery Mode
- 2.8 Method 8- Factory reset
Reasons Behind Can’t Connect to Camera Issue
So, first of all, I would like to inform you that there is no particular reason behind this
issue. It may be due to below reasons –
Phone hardware issue:
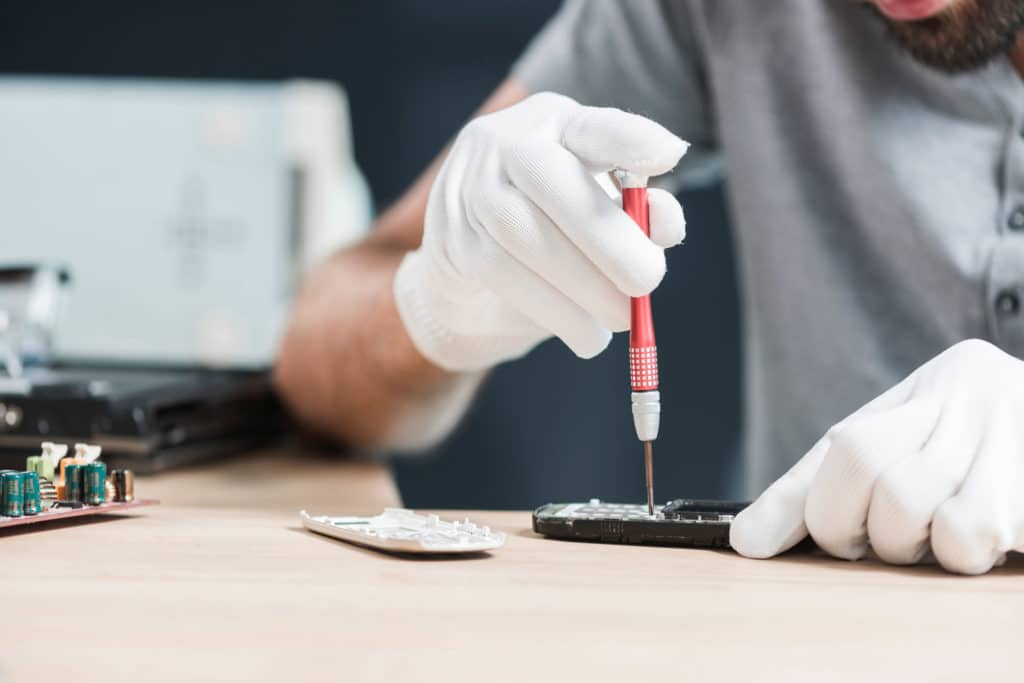
It may be due falling of your android smartphone or breakdown of any part.
Phone software issue:

It may be due to the presence of any corrupt file on the device or any kind of software issue.
Third-party app permission issue:
Several times we give permissions to an unauthorized application which creates software issue later.
Update issue:
So many times I have faced with wrong or error including updates direct from your smartphone company only.
Temporary heavy use or misuse issue:
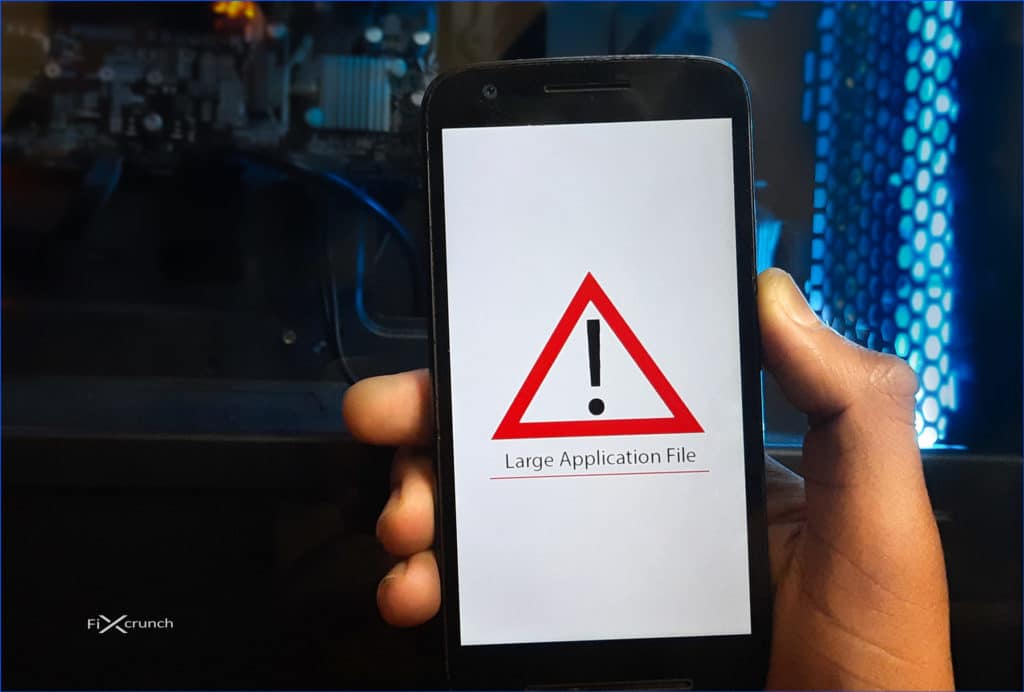
Running large size android apps which is not comfortable with the hardware specification of your device may create this kind of issue.
Virus infection issue:
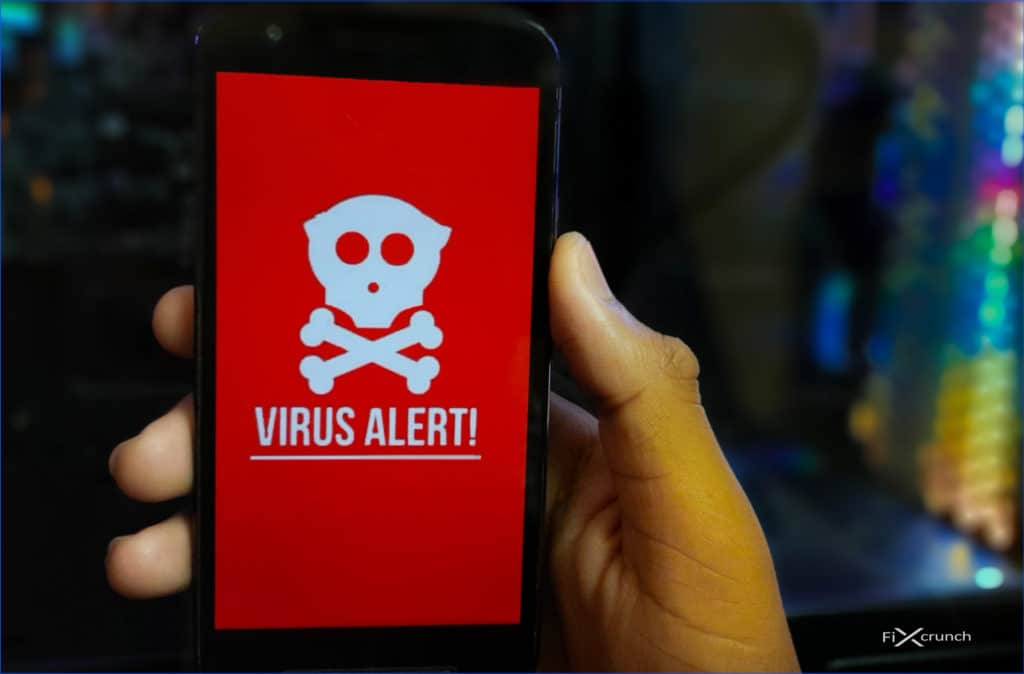
Download files from the internet or from any other device may contain infected files which may cause an error later.
Ways of Fixing Can’t Connect to Camera Issue
If there is any hardware or software issue on your phone then none of these below tricks will be helpful for you. But as you can’t catch up the particular reason for this issue. So you must try all the methods to resolve the issue.
Method 1- Restart your device
It’s a very common method to try and so many people have reported that the issue has been resolved after restarting the device. So you need to turn off your device then again on it.
Method 2- Restart in safe mode
There is a safe mode restart option on Android. To restart in safe mode.
- Hold on the power button until the “shutdown option” display.
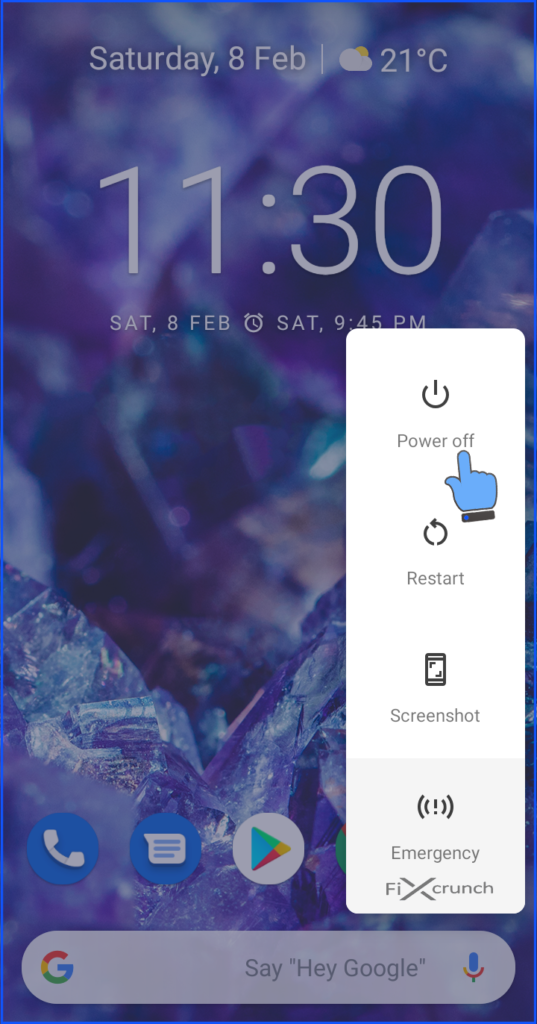
- Then hold on the “Power Off” option displayed on the screen.
- “Confirm” your safe mode reboot.
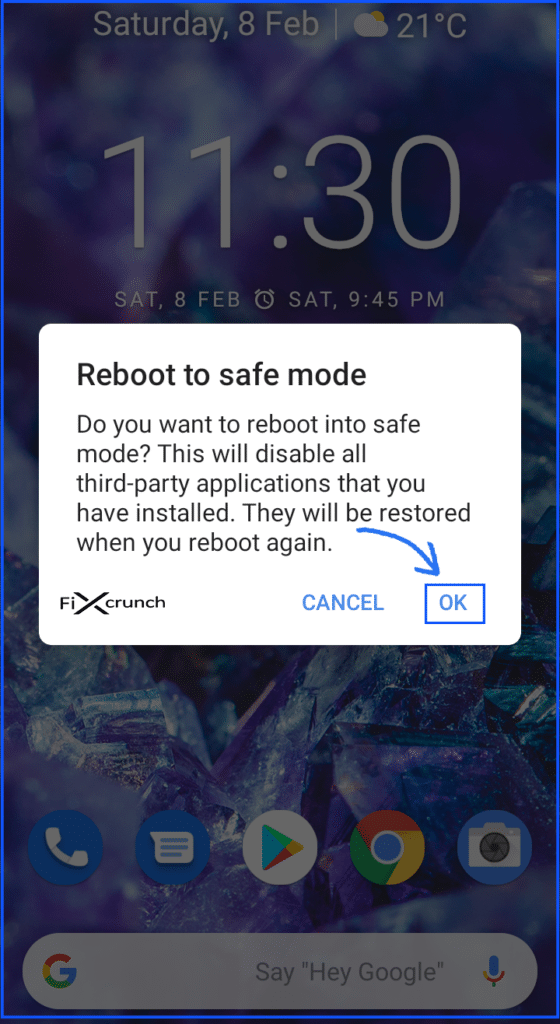
When you started in Safe mode, access the system camera application. Take a few pictures if it allows you to and then closes the app. Access the camera app again and see if it still works. If it works properly in safe mode then you are facing the problem with the allowance of any third party app that isn’t allowing other applications to access the camera.
Method 3- Remove all the apps that you have given access to the camera
So many installed apps on your device accessed to the camera. So you need to do that uninstall all the third-party applications that you have given access to the camera. This may cause can’t connect to camera error.
Method 4- Delete all cache data of your camera app
Try deleting all the cache data of your camera app. For removing cache data of your smartphone follow below method –
- Go to settings of your phone
- Find Apps and notifications.
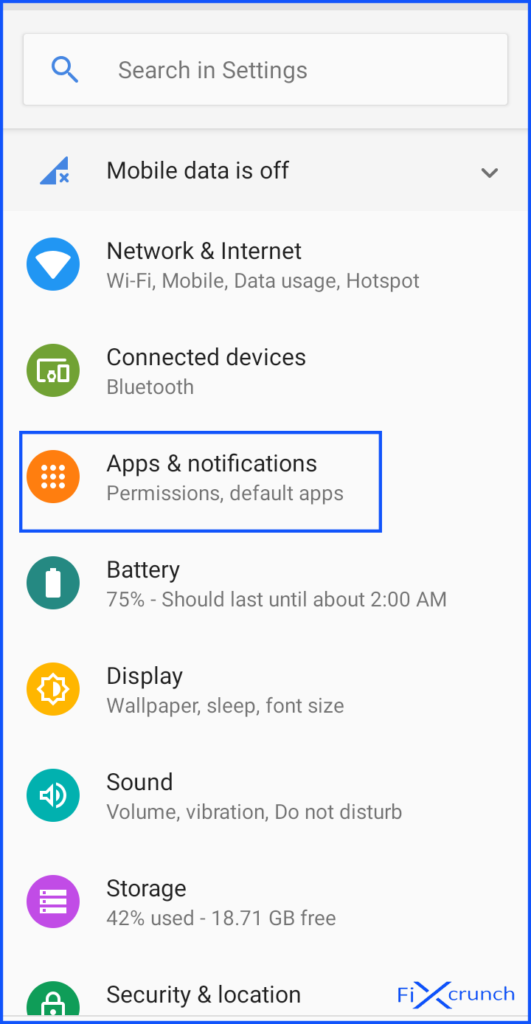
- Search for the app “camera“, open it up.
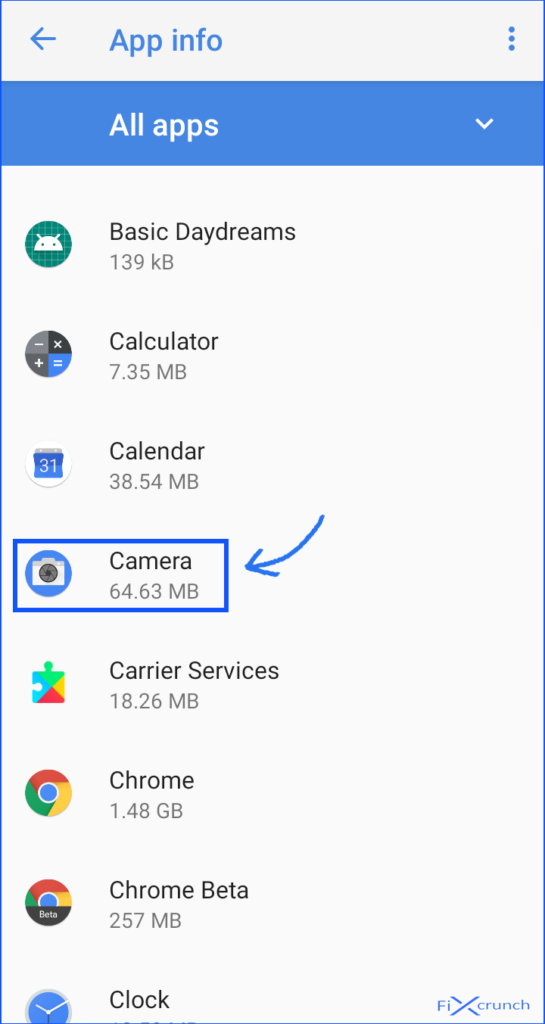
- Then click on the “storage” section.
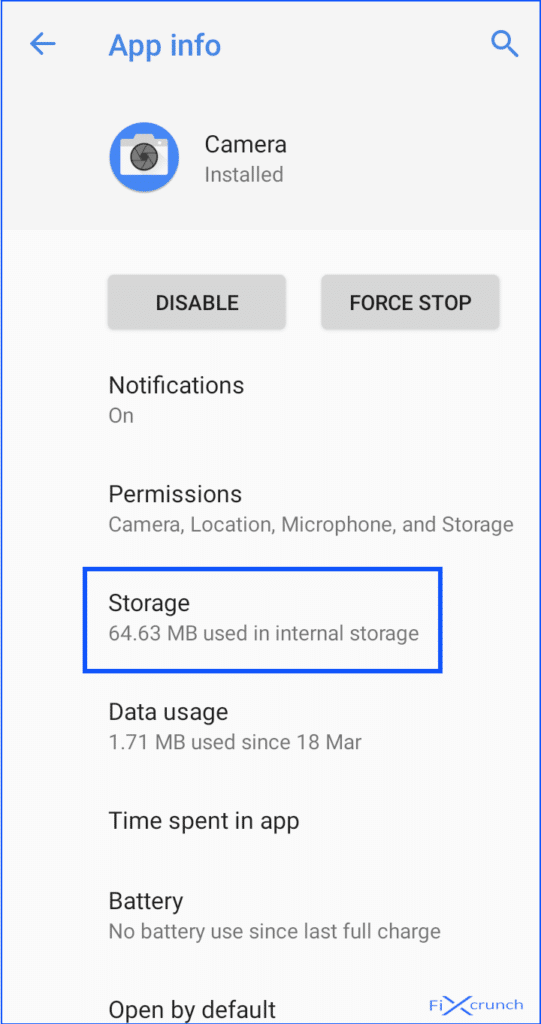
- In there you need to click on the “Clear Cache“, also click on the “Clear Storage” for better clarification.
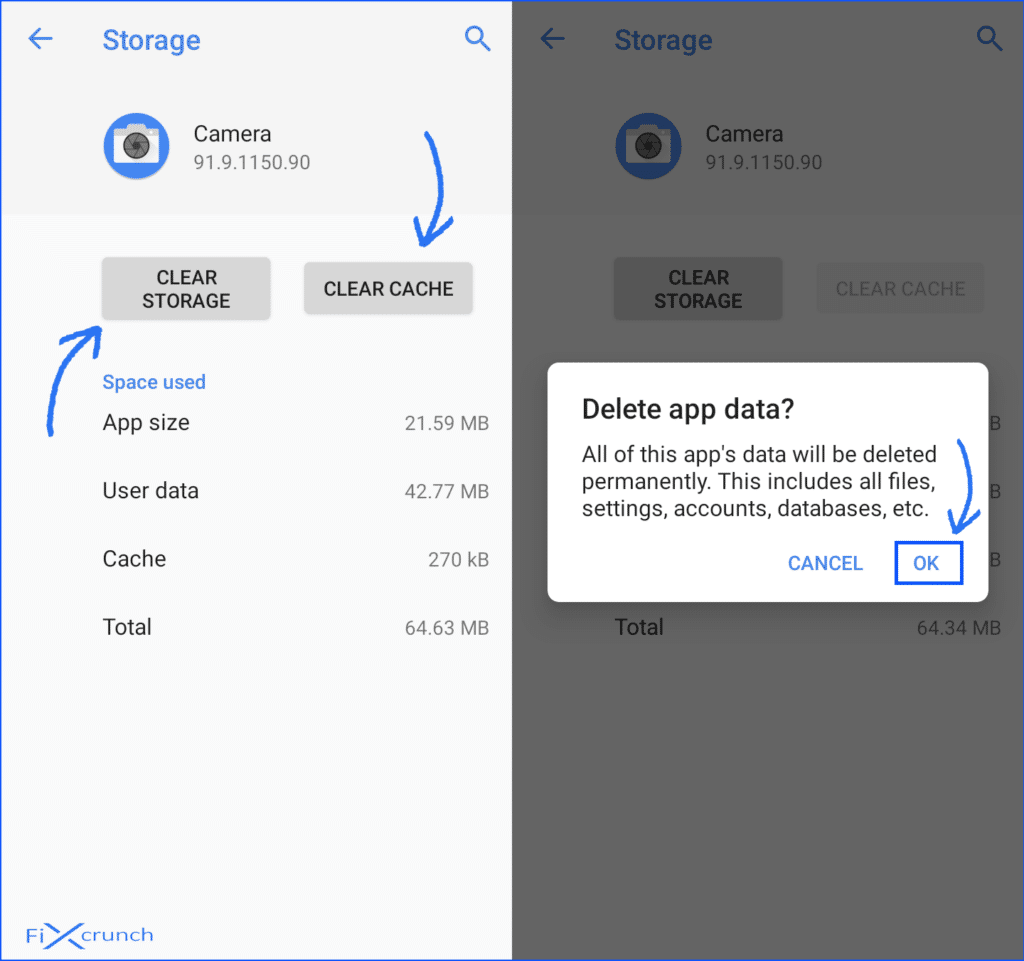
After that, trying to open your Camera and check that weather that you are getting the same error.
Also Read:- Best Ways to Solve error retrieving information from server RH-01
Method 5- Force stop the camera app
So many users have reported that force stopped of the camera app resolved their issue.
For force stop the camera app.
- Follow the previous steps to go “Camera” under the settings.
- On the Camera section, you will see the “Force Stop” button just click on it.
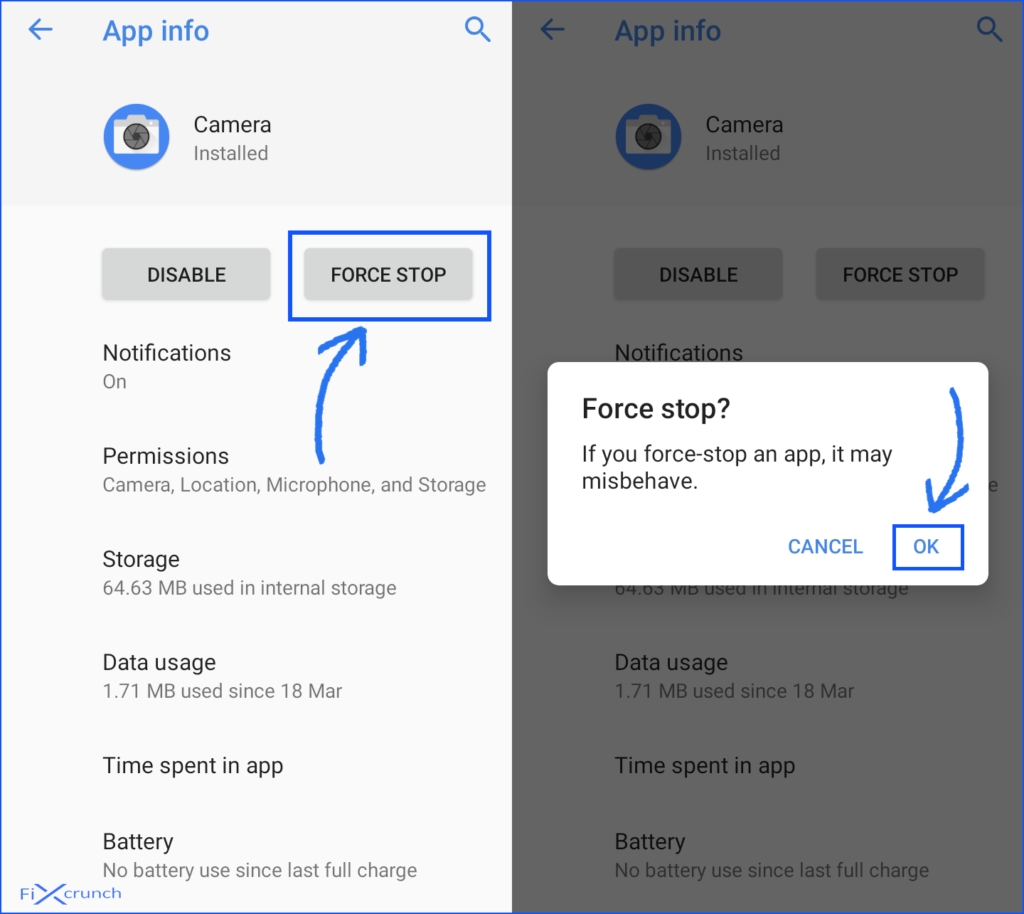
After force Stop, clear all the minimized app then try reopening the camera app, On
clicking the camera icon.
Method 6- Try installing any third party camera applications
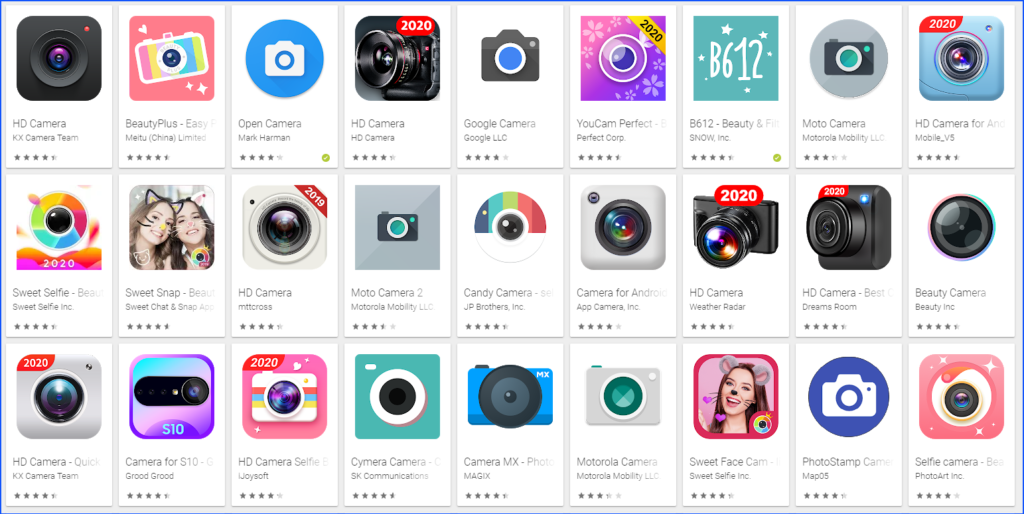
Try installing any third party camera app. There are so many third party camera apps as B612, Candy camera, camera for Android, etc. You need to check to install any one of the application. And if it works ok then, you have a problem with your own camera app.
Also Read:- Top 7 Ways To Fix Failed to obtain IP Address Error
Method 7- Wipe cache partition by Recovery Mode
Several times recovery of the previous data of your phone resolves the error. It also means removing the update of your smartphone. Follow up below steps.
- Power off the device.
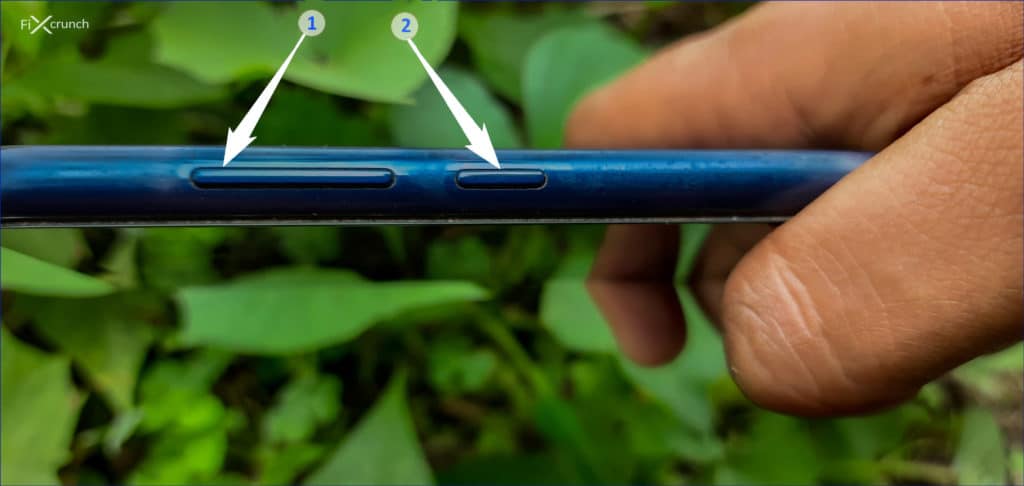
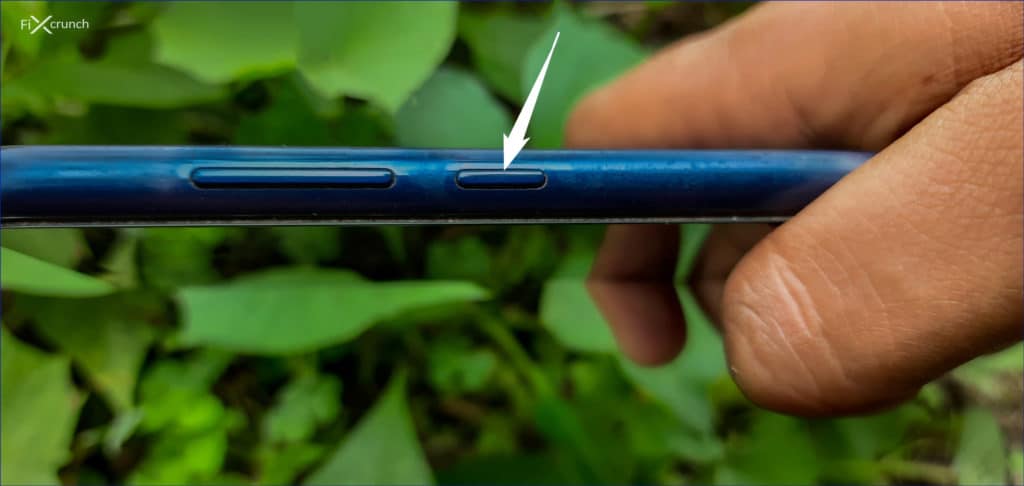
- Hold the “Volume up button(1) + Power button(2)” for some time, Recovery mode menu open.
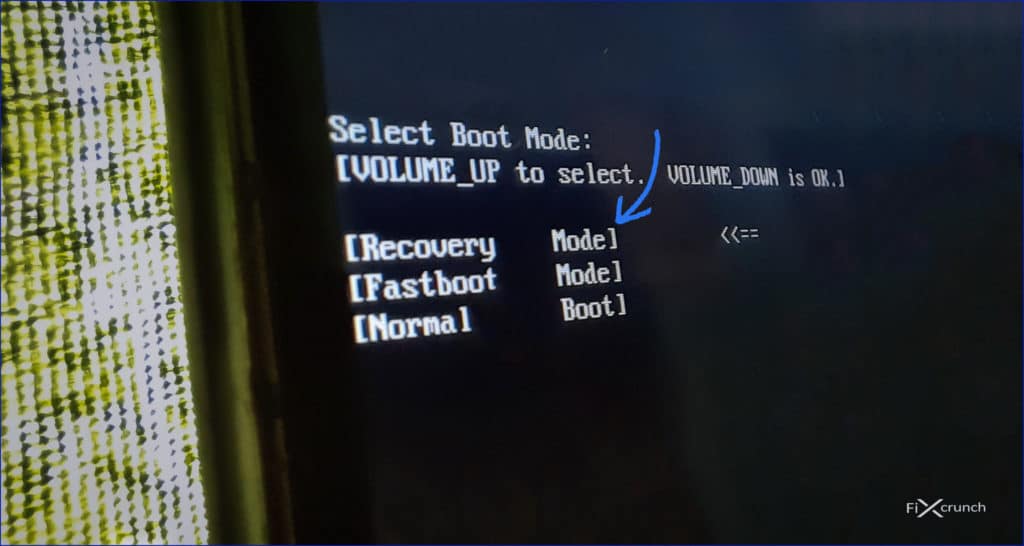
- But in some phones, You need to select Boot Mode. On that Boot Mode, you will need to select “Recovery mode“. (Note:- Use the Volume Up button to navigate to Boot mode and press the Volume Down button to enter)
- After that Recovery Mode menu will show up on your screen. But in some cases, the android logo will show up.
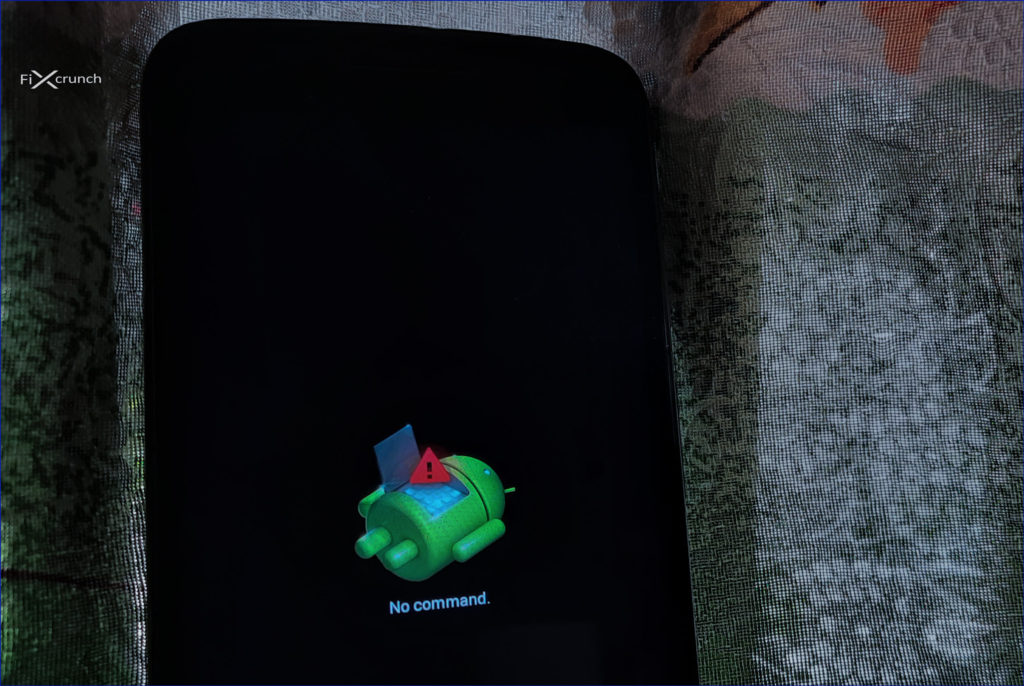
- So on that time Press and hold the “Power Button(2)“ and then press the “Volume Up(1)“ button once. then you will get the Recovery Mode menu. (Still, if you did not find just google it with your device name or got to https://www.hardreset.info for all devices)

- Find Out the option that asking “Wipe cache partition” using volume buttons and press the power button to confirm the action. Wait for some time to complete it and you will see “Cache wipe complete” confirmation message. (Note:- Use the volume up & down button to navigate to Recovery mode and press the power button to enter)
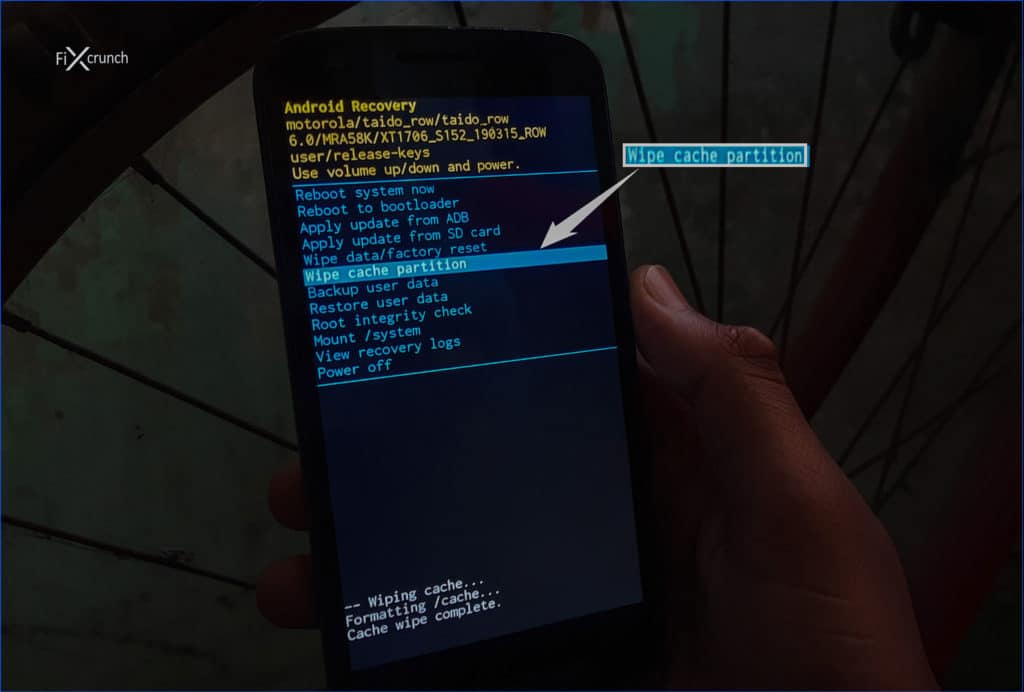
If you can’t understand the text version then watch the video version. I think you can understand.
After it is successful, restart your android phone and try opening the camera app again.
Please keep in mind that in your device or smartphone it may be some other
combination to access the maintenance and recovery mode.
Method 8- Factory reset
This is the last option you have. A factory reset deletes all the data present on your smartphone. So take a backup of all the files present on your phone to factory reset.
- Go to settings of your phone
- Find “Backup & Reset” under the settings.
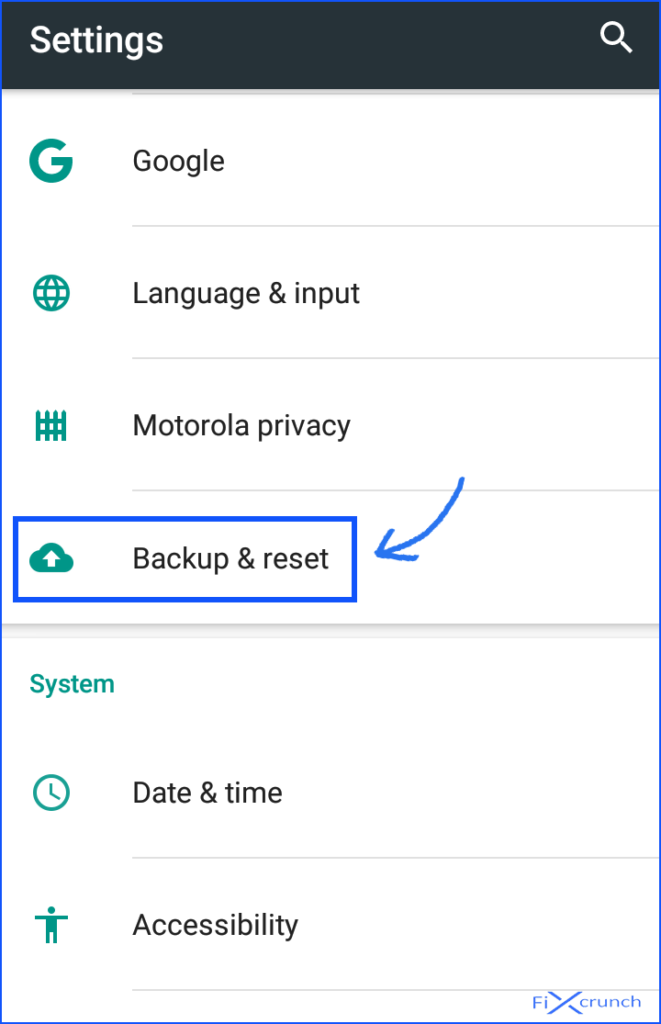
- Under “Backup & Reset” you will see “Factory data reset”,
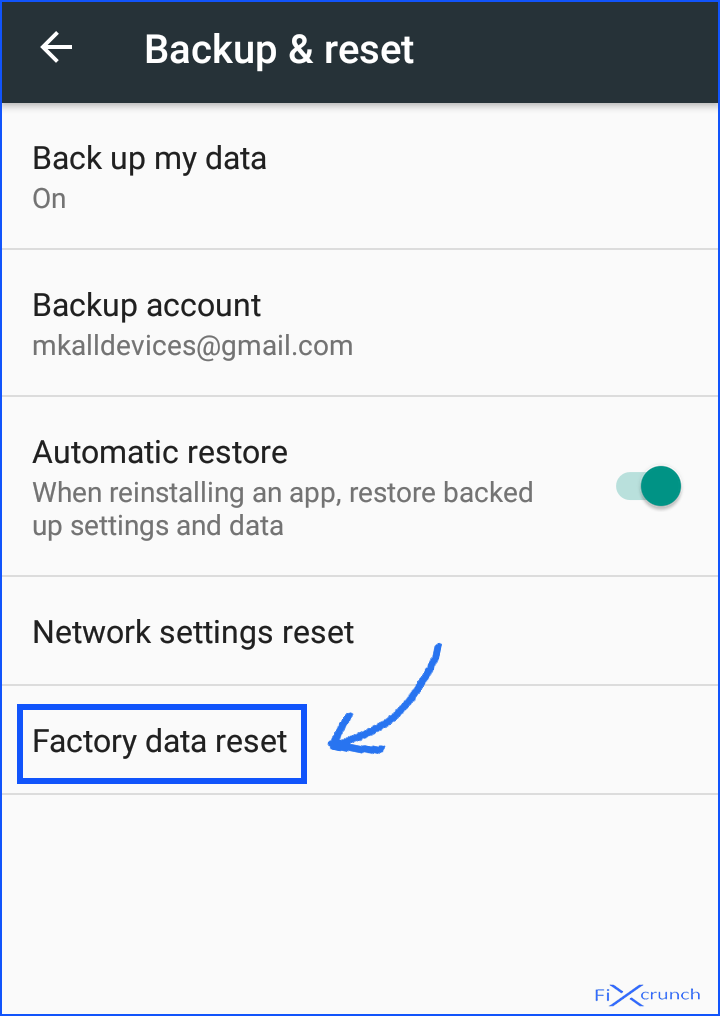
- just click on it and in there click on the “Reset Phone”.
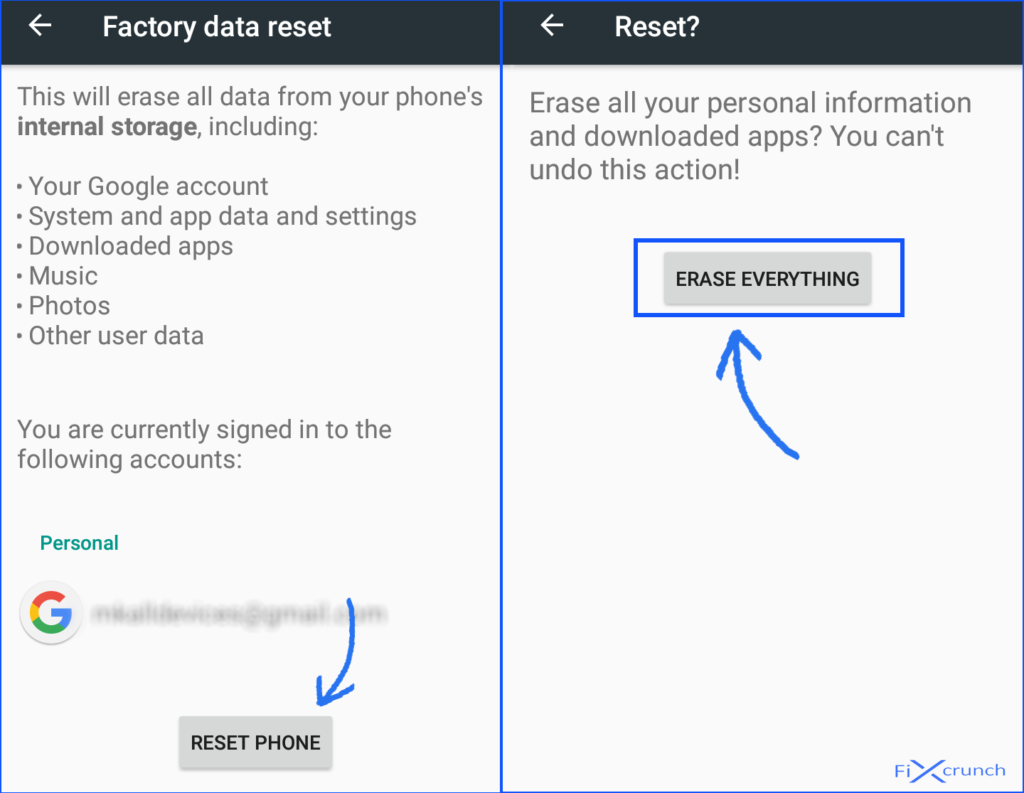
- Enter security credentials if you set on your device if you don’t have or if you don’t have to leave it. Wait for some times and your phone completely reset.
or
Following this method, you need to go back to Method 7 for “Recover Mode menu“.
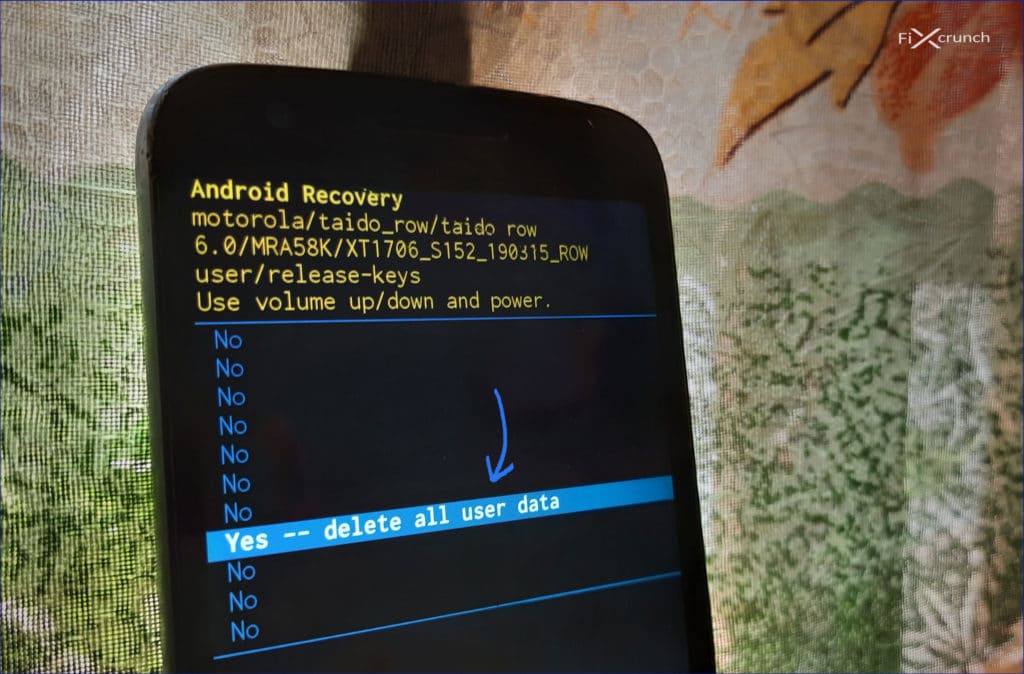
- Opening the Recover Mode menu then find “Wipe data/factory reset” and open it.
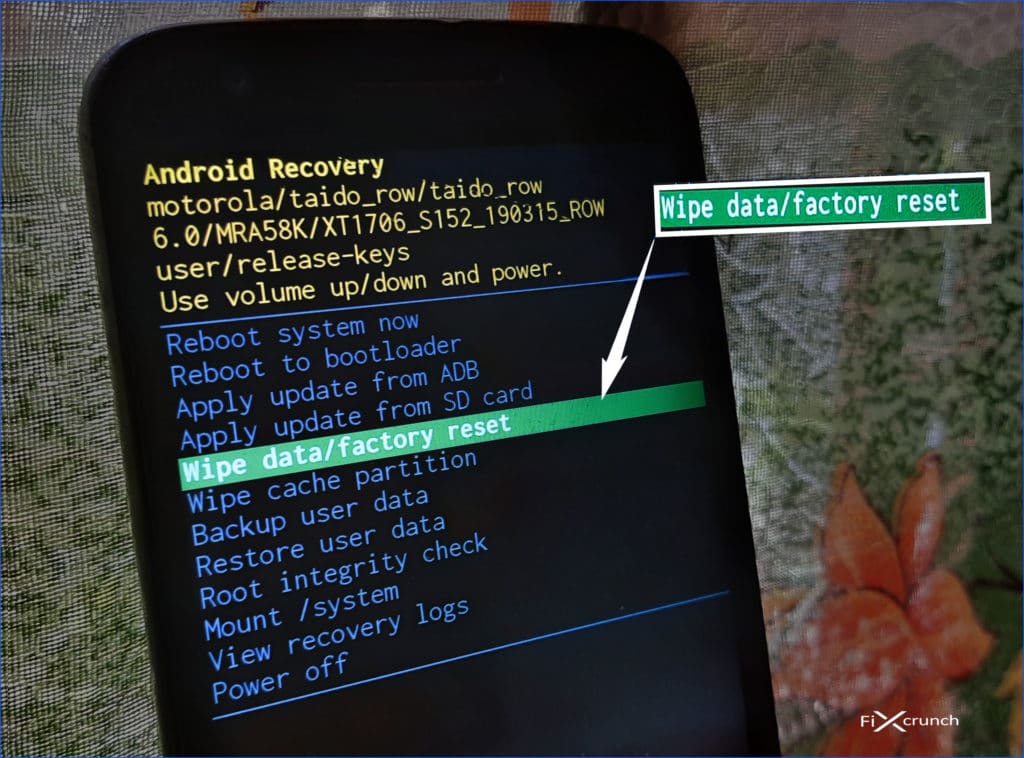
2. Use the volume up & down button to navigate to Recovery mode and press the Power Button to enter
3. In “Wipe data/factory reset” section select “Yes — delete all user data” using the same method.
Wait for some time and you are good to go with your phone. Now “Power off” and turn on again, your phone is not completely reset. After trying to open your Camera and check that weather that you are getting the “can’t connect to camera” error.
I wish the issue may have been resolved after following the above-mentioned steps. If none of those above steps resolved our issue, then be sure you are facing with phone software or hardware issue. In this case, you should consult with the nearest service centre of your mobile phone brand.
1 comment
Hellow Ghosh.
Thank you for this helpful article. It really got my back because my phone got this same problem but with the help of suggested options I got to fix it.
Thanks.